
Don’t panic!
One day, you’re standing on the slope, the skis are shining in the sun, your bindings are tight and responsive, and your boots are integrated with your board. At that moment, the world stops. You think to yourself, this is how skiing should feel!
After such a great experience, you can’t wait to book another trip—this time to a more remote location.
But, to your surprise, something goes wrong with your ski bindings during the trip… and suddenly everything becomes strange.
So, it’s time to learn how to adjust your ski bindings .
Don’t underestimate this matter, it not only affects your skiing experience, but also directly affects safety issues. And to be honest, after you learn it yourself, you will feel more at ease skiing.
Why should I adjust my ski bindings?
Good question!
In fact, most of the time, you can also rely on professional technicians in the ski shop to help you adjust it.
But the problem is that there are always emergencies on the way of skiing, and you can’t always rely on others.
And if you don’t understand the basic workings of the binding, how can you really master your snowboard?
Even if it’s just for fun, mastering the adjustment method yourself can make your skiing time more free and smooth, without having to go to the store frequently because of minor problems.
Ultimately, learning how to adjust your bindings is about giving yourself a little more freedom and a little more security.
What do I need to prepare to adjust my ski bindings?
The good news is: it’s easy.
All you need is a screwdriver, preferably a ski-specific multi-tool, which is readily available at ski shops,
and the most important “equipment” – you and the pair of ski boots you want to adjust.
Adjustment steps are coming!
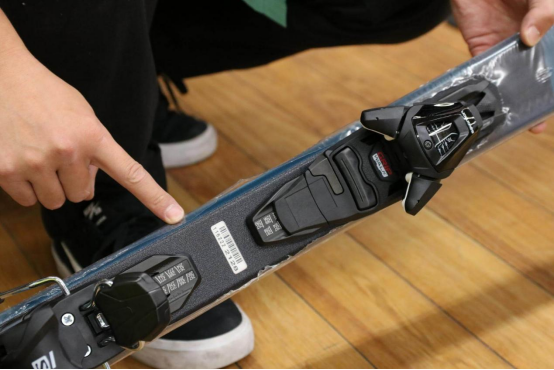
Step 1: Adjust the Toe Piece
Find a flat surface and lay your board down.
Release the small brake next to the binding to make the board easier to maneuver.
Next, take out your ski boots and look at the heel position, where the length of the sole is usually marked (in millimeters).
Note this number, and then – insert the toe part of the boot into the front of the binding.
Insert it to the end, and then gently press down on the heel. Hear a crisp “click” sound, indicating that it is basically in place.
If it’s too loose or too tight, don’t worry, just use a screwdriver to adjust the width of the toe piece –
loosen it to make it wider, tighten it to make it narrower.
Some new bindings can even be adjusted directly by hand without a screwdriver, which is super convenient.
Step 2: Adjust the Heel Length
After inserting the boot, pay attention to whether the heel piece fits tightly.
If it feels like there is a gap or it is too hard, you can adjust the screws at the back of the binding to move the heel part forward and backward until the boot can be fixed comfortably.
Remember, they must fit tightly without any gaps, otherwise the boots may fall off during sliding, which is very dangerous.
Once you have adjusted it to the right position, tighten the screws. Here are the tips:
The boots should fit in naturally and smoothly.
After being inserted, it cannot be shaken left or right
It’s okay to try this step a few times. When skiing, safety comes first.
Step 3: Adjust the DIN Release Settings
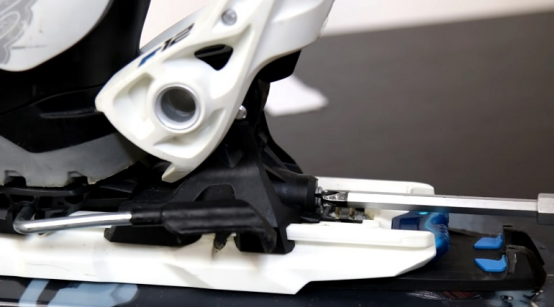
At this point, some people may ask: What is DIN?
Simply put, it is the setting of whether the binding will “bounce” to let you go when subjected to force .
If it is set too low, it will come loose with a small collision, and if it is set too high, it will not come off when you fall hard, which may cause injury.
Usually, the DIN value is set according to weight, height, and skating style.
You can find small screws to adjust the DIN near the toe and heel of the binding.
Basic rules:
Turn clockwise to increase the DIN value (more secure and less likely to fall off)
Twist counterclockwise, DIN value decreases (easier to fall off)
When adjusting, don’t rely on your feelings. It’s best to use a standard DIN table or ask a professional in a ski shop to measure it for you.
FAQ Tips
Q: Can I install new bindings on an old snowboard?
Yes, but you have to drill new holes. Every time you drill a hole, the structure of the snowboard is weakened.
If you have drilled more than 3 sets of holes, it is strongly recommended to replace the board, otherwise it will break easily.
Q: How much does it cost to install the bindings at a ski shop?
About $50. Many shops will provide free installation if you buy bindings from them, which is quite cost-effective.
Q: Do I need to bring my ski boots to install the bindings?
It is best to bring them. Although in theory you can install the bindings as long as you know the length of the boot sole, on-site adjustment is the most accurate, and safety comes first.
Final instructions
Learning how to adjust your ski bindings is definitely not a waste of time.
It allows you to be freer and safer on the slopes.
If you feel something is wrong while skiing, don’t panic. Find a place to stop and adjust it yourself. It’s easy to fix.
Final tips:
Do not use too much force when tightening the screws to avoid damage.
Check the status of your binder regularly
As your skiing skills improve, remember to adjust your DIN settings accordingly.
There are endless scenery on the snow trails, but safety is the most beautiful scenery. ⛷️✨Have
fun and ski freely!
Safety note: This article is for general information only. It is not medical, training, emergency, survival, or professional safety advice. Conditions, equipment needs, and personal health factors vary, so check current local guidance and consult qualified professionals before acting.